Electrolux EKG5543 User Manual
Browse online or download User Manual for Cookers Electrolux EKG5543. Electrolux EKG5543 User's Manual
- Page / 32
- Table of contents
- BOOKMARKS
- Model EKG5542/EKG5543 1
- CHILD SAFETY 2
- DURING USE 2
- CLEANING AND MAINTENANCE 2
- INSTALLATION 2
- CONTENTS 3
- DESCRIPTION OF THE APPLIANCE 4
- BEFORE USING THE APPLIANCE 6
- THE HOB 7
- THINGS TO NOTE 8
- THE GRILL 9
- THE MAIN OVEN 11
- HINTS AND TIPS 12
- COOKING CHART 13
- ROASTING CHART 14
- SLOW COOK 15
- Vegetables 16
- CARE AND CLEANING 17
- REPLACING AN OVEN LIGHT BULB 21
- SOMETHING NOT WORKING? 22
- SERVICE AND SPARE PARTS 23
- CUSTOMER CARE DEPARTMENT 23
- GUARANTEE CONDITIONS 24
- TECHNICAL DETAILS 25
- INSTALLATION INSTRUCTIONS 26
- MOVING YOUR APPLIANCE 27
- FOR YOUR SAFETY 27
- LOCATION OF APPLIANCE 27
- LEVELLING THE APPLIANCE 27
- CONNECTING TO GAS SUPPLY 29
- FITTING THE STABILITY CHAIN 29
- PRESSURE TESTING 29
Summary of Contents
Model EKG5542/EKG5543
10 Place the grill pan on the shelf so that the pan is positioned centrally beneath the grill. Ensure that the cut out on the underside of the handl
11 THE MAIN OVEN HEAT ZONES There are zones of heat within the oven. The temperature in the middle is the gas mark you have chosen. The top of the
12 HINTS AND TIPS • Arrange the shelves in the required positions before switching the oven on. Shelf positions are counted from the top downwards
13 COOKING CHART The oven temperatures are intended as a guide only. It may be necessary to increase or decrease the temperatures to suit individu
14 ROASTING CHART INTERNAL TEMPERATURES – Rare : 50-60°C; Medium : 60-70°C; Well done : 70-80°C MEAT Gas Mark COOKING TIME Beef/ Beef boned 5
15 SLOW COOK The slow cook setting gives a very low heat in the oven. It is particularly useful when you are cooking soups, stews and casseroles bec
16 Vegetables • Cut into small pieces. • Dried beans must be pre-soaked then boiled in an open pan for 15 minutes before adding to any dish. •
17 CARE AND CLEANING Before cleaning always allow the appliance to cool down before switching off at the electricity supply. CLEANING MATERIALS
18 CLEANING THE HOB Clean the hotplate top using a mild abrasive. Take care not to damage the spark electrodes. If the spark electrodes are damaged
19 CLEANING INSIDE THE GRILL AND OVEN COMPARTMENTS The sides and back of the main oven compartment are coated with a special Stayclean coating. They
2 IMPORTANT SAFETY INFORMATION These warnings are provided in the interests of your safety. Ensure that you understand them all before installing
20 CLEANING THE DOOR(S) To prevent damaging or weakening the door glass panels avoid the use of the following: • Household detergents and bleaches
21 REPLACING AN OVEN LIGHT BULB The type of bulb required is a 300°C 25 watt small Edison Screw. Disconnect the appliance from the electricity s
22 SOMETHING NOT WORKING? We recommend that your appliance has an annual gas safety check carried out by our approved service organisation. Please c
23 SERVICE AND SPARE PARTS In the event of your appliance requiring service, or if you wish to purchase spare parts, please contact your local Serv
24 GUARANTEE CONDITIONS Standard guarantee conditions We, Electrolux, undertake that if within 12 months of the date of the purchase this Electrolu
25 TECHNICAL DETAILS DIMENSIONS Height: 900 mm (nominal) Width: 550 mm (nominal) Depth: 600 mm (to front of door panel) Weight:
26 INSTALLATION INSTRUCTIONS IMPORTANT – SAFETY REQUIREMENTS Where applicable Natural Gas and L.P Gas versions of this appliance are available. Ch
27 MOVING YOUR APPLIANCE You may damage some soft or badly fitted floor coverings when you move the appliance. The floor covering under the applian
28 CONNECTING TO THE ELECTRICITY SUPPLY Warning: This appliance must be earthed. Do not earth this appliance to the gas supply piping. Con
29 CONNECTING TO GAS SUPPLY This appliance is designed to be installed with an appliance flexible connection only. Supply piping should not be less
3 CONTENTS FOR THE USER Important Safety Information 2 Description of the Appliance 4 Getting to Know Your Appliance 5 Before Using t
30 CHECKING THE GRILL Place the grill pan containing the grid, with the handle attached, into the grill compartment. Light the grill burner by turnin
NOTES 31
IMPORTANT NOTICE In line with our continuing policy of research and development, we reserve the right to alter models and specifications without pr
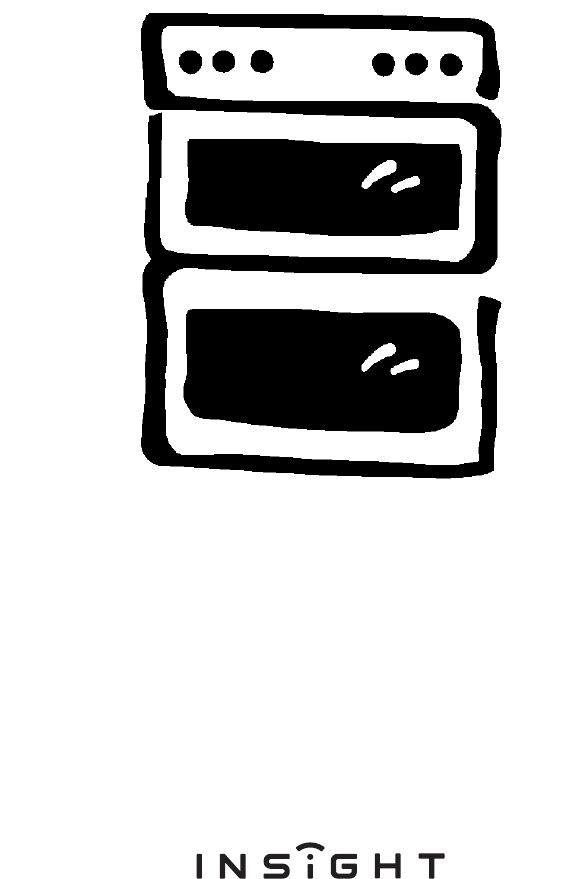
4 DESCRIPTION OF THE APPLIANCE SLIP-IN GAS OVEN Main Oven Control Panel Grill
5 GETTING TO KNOW YOUR APPLIANCE THE CONTROL PANEL FEATURES A - Hotplate Control B - Hotplate Control C - Main Oven Tempe
6 BEFORE USING THE APPLIANCE RATING PLATE This is situated on the front frame of the appliance and can be seen upon opening the door. Alternative
7 THE HOB USING THE HOB The gas hob has different burner sizes to suit different types of cooking: To ensure maximum burner efficiency only use pots
8 In the event of the burner flames being accidentally extinguished, turn off the burner control and do not attempt to re-ignite the burner for at
9 THE GRILL CAUTION – Accessible parts may be hot when the grill is in use. Young children should be kept away. When you first operate the gril
Related products and manuals for Cookers Electrolux EKG5543
 (44 pages)
(52 pages)
(48 pages)
(40 pages)
(44 pages)
(52 pages)
(48 pages)
(40 pages)

 (28 pages) (48 pages)
(33 pages)
(38 pages)
(52 pages)
(40 pages)
(48 pages)
(52 pages)
(52 pages)
(24 pages)
(40 pages)
(28 pages) (48 pages)
(33 pages)
(38 pages)
(52 pages)
(40 pages)
(48 pages)
(52 pages)
(52 pages)
(24 pages)
(40 pages)
© 2020, manymanuals.com. All rights reserved. | 3.907 s |
 Manymanuals.com
 Manymanuals.de
 Manymanuals.fr
 Manymanuals.it
 Manymanuals.pl
 Manymanuals.cz
 Manymanuals.es
 Manymanuals-pt.com
Comments to this Manuals